CLARE HEDGES
FOAM LATEX

We were lucky to have the foam latex expert Gilles Paillet teach us for a couple of days. We learnt so much from him and he was able to answer all of our foam latex questions and gave us a lot of information about the industry.
He bought along an example of his work, a foam latex arm from a film which he had worked on. The arm was reforced using power netting - before running foam, glue fabric onto the core with spraymount. The foam will then grab onto the fabric. I was fascinated by the texture of the arm which was sculpted by Rick Baker.
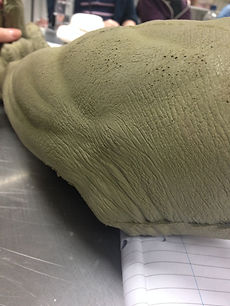

Fig. 10
Fig 12.
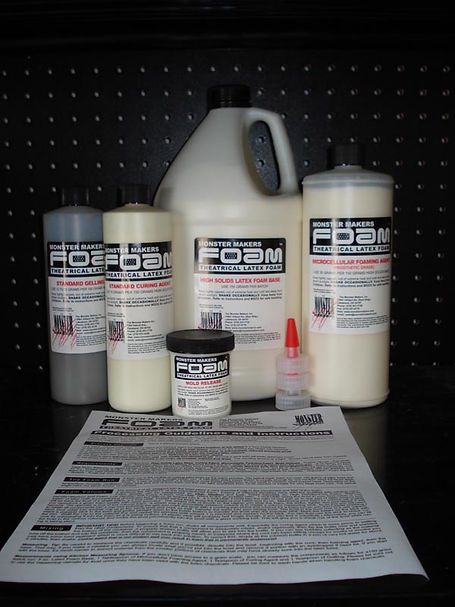
FOAM LATEX COMPONENTS
Gilles recommended using Monster Makers foam as he feels it is the most effective and reliable.
1) Cream Latex Base - this will be mixed to other components
2) Foaming agent - this makes the foam rise - 20% foaming agent of total amount of cream latex base E.g 20g foaming agent to 100g foam latex base
3) Standard curing agent - 10% of the amount of latex
4) Gelling agent - add at the end. 14% - (the hottter the weather, the less percentage of gel you use)
When running foam take notes such as: the date, temperature of room, humidity, name of the project, name of the piee, colour/pigment used.
Then note: the type of mixer, the amount of latex base, foaming agent, curing agent and gelling agent.
It is important to buy a thermometer to be able to keep track of these details
Fig. 13
Pigment can be used in foam - Skin Illustrator, Monster Makers pigment, food colouring but no oil based products.
FOAM PROCESS
-
Shake every component before using it. Add 20% foaming agent, add 10% curing agent, 12-14% gelling agent (dependant on tempterature).
Whisk for up to 2 minutes on high speed, this adds air bubbles to the foam and makes it rise. -
Refine the foam by mixing it for a further 6 - 12 minutes, this will make the bigger air bubbles smaller and in term will make it smooth
-
Apply a thin later of release into the plaster mold (there are many dfferent molds however will we will be using plater molds). Gilles explained that plaster molds are inexpensive but can be difficult to work with as they crack easily. Other molds : Silicone molds, Urethane resin ( fast cast) Fibreglass. You can use spray glue on all of these.
-
Remove as much flange as possible as it can use more foam to the fill flange
-
Spray water over piece so it does not dry out too much - as foam shrinks
-
It is important to use gloves when handling foam latex as the Ph of the skin stains the foam yellow
-
Biggest enemy of foam is moisture - causes steam collapse
-
Open molds take longer in the oven - the oven is a special oven as fumes are released during the cooking foam process
-
Heat takes 1 hour per cm of (plaster) mold
-
Fibreglass mold - heat takes 1 hour per millimeter
-
When cleaning the mold, use IPA not white spirit as this keeps it greasy
This is Gilles mold filled with foam latex
After it had cured in the oven - it changes colour once it has cooked, it is more yellow than the previous white
After carefulling removing the foam piece with talc, this was the result
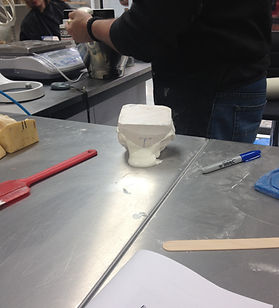
Fig. 14
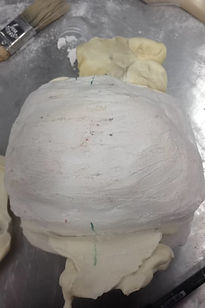
Fig 15.
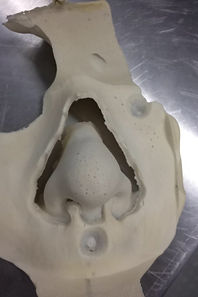
Fig 16.
Gilles showed us how to make flat pieces using foam latex - the same method that is used to create silicone flat pieces.
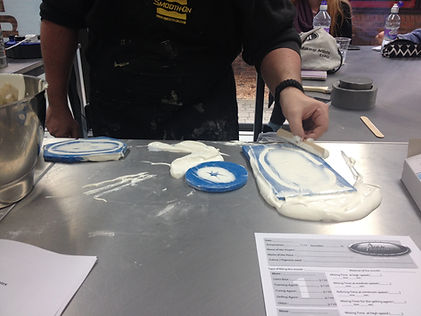
Fig 17.
INJECTION MOLD METHOD
-
You can drill the hole in any thick part of the mold.
-
Fit a tube and fill the gaps with car body filler
-
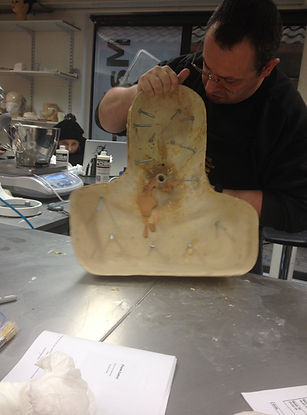
Drill bleeding holes into the eyes, nose, mouth and chin to avoid undercuts. Use screws and bolts to keep the mold in place. Do not use copper as it will turn the foam black.
-
Then block chin bleeder to push foam upwards
-
Use WED based clay to 'plug' the bleeders as opposed to oil based clay
DEMOLDING -
It is cooked when foam on outside
-
Easier to demold as it has been run a dew times
-
Powder to demold
-
Needs to be washed in hot/warm water in fairy liquid due to the fumes and chemicals in foam

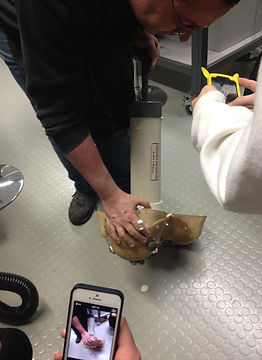
Fig 18.
Fig 19.
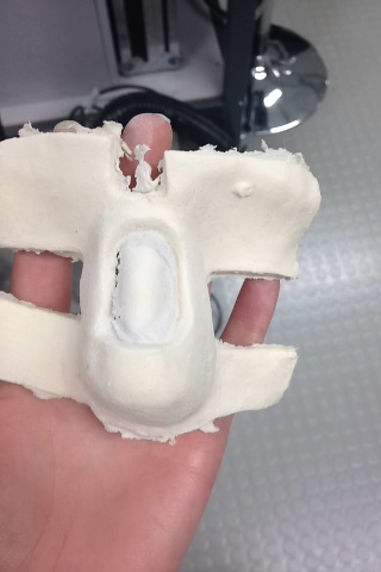
This was the result of my foam latex nose piece. Although I was already aware that I had created too much grounding for such a small piece, this emphasised it and showed me how much material I had wasted.
Fig 21.
Fig 20.
7


APPLYING FOAM PIECES
-
It is best to pre colour foam latex as it is opaque and is best to have a base to work upon.
-
Foam can be pre coloured using pax paint (prosaide and acrylic paint) or flocking
-
Foam can sometimes look like it has a plastic coat on it as it can wrinkle unnaturally.
Foam latex can be painted using Rubber cement however this is a toxic material to use and should only be used in the right environment with correct protective clothing and ventilation.
Low odour white spirit and oil paint is used with the rubber cement,
This has advantages as it soaks into the foam, the disadvantage is that is has a longer prep time.
Application:
-
Glue down in a small sections
-
Begin gluing in the middle, transfer prosaide and hairdry, then stick down.
-
Start from the middle and work out from middle
-
If doing a full face in foam, glue straight down the middle - forehead, nose, chin
-
When losing prosaide, you can glue straight away because it is porous and you do not need to wait till it is clear
-
Use a thin amount of glue
-
Use cabo-patch on the edges - ratio of cabosil to prosaide depends on preference.
-
Dry with hairdryer - cabo - patch may need several layers
-
Use prosaide to stipple over edge and whole foam piece using a stipple sponge. Wait until dry and then use powder to take away stickiness.
PAINTING PIECE
-
Can use rubbermask grease paint which is grease paint especially made for foam latex (expensive)
-
Alcohol + grease can be used and should be stippled more than brushing
-
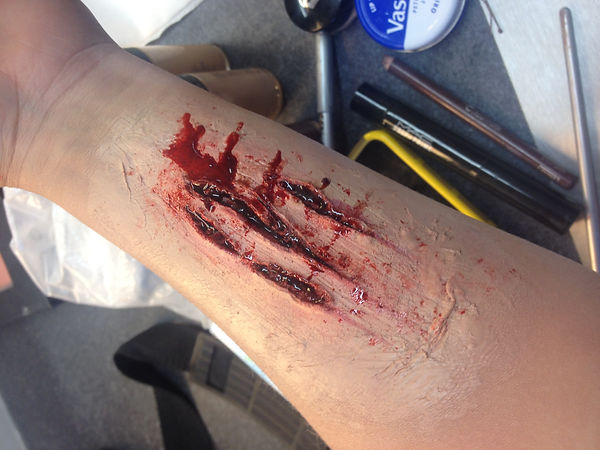
Build up in layers - 1) blood red layer 2) build up flesh tones.
Fig. 21.2
This picture shows the initial wash of red which acts as the base for the flesh tones which are next applied.
Fig. 21.3
This picture shows the wrinkling tha cant happen with foam.
Fig. 21.4
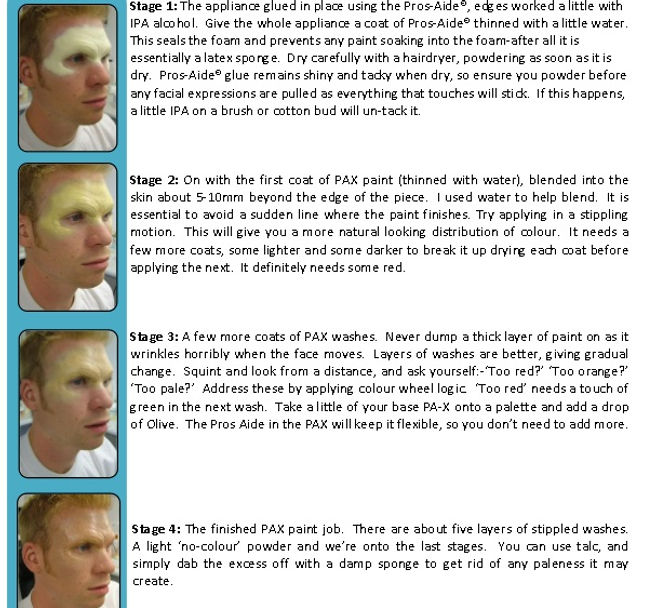

Bray uses pax paint as the base and then uses alcohol colours over the top of that. He also used Rubber mask grease paint which is especially for foam piece but only used this around the eyes in the final make up rather than on the piece which is interesting.
Bray thins his pax paint which water and uses water to help blend the paint. He also suggests painting 5-10mm beyond the egdge of the piece as it will help blend the piece into the skin rather than leaving a sudden line where the paint finishes. This is a really good tip which I will use in the future when painting foam.
Explains that it is important to build the paint up in washes, rather than heavy 'dumps' of paint as the piece will wrinkle. Layers are important
He suggests using colour theory when painting e.g. if the paint is too red then apply green in the next wash.
Fig. 21.1
Fig. 21.5
EXAMPLES OF FOAM LATEX
These are some examples of foam latex pieces, foam is better used for larger pieces as it is very lightweight.

Fig 22.

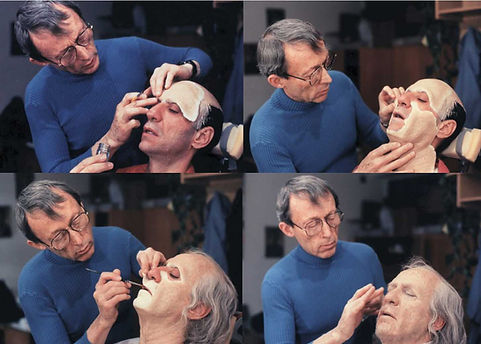
Dick smith applying his foam latex Amadeus (1983) make up to F. Murray Abraham.
. http://www.btlnews.com/awards/makeup-awards-celebrate-the-creation-of-timeless-screen-characters/

This is the final make up of Dick Smiths Amadeus which I think is incredible especially as it was created using foam latex which is opaque - the skin looks translucent and there are no cidible edges.
Fig. 24
Fig 23.
Fig 25.