CLARE HEDGES
FULL HEAD CAST

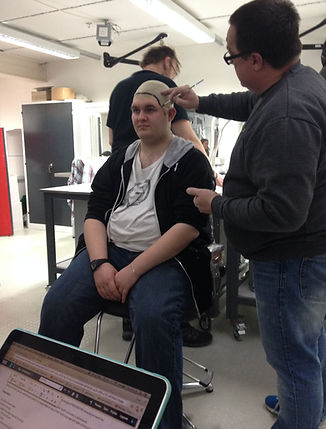
PROCESS FOR HEADCASTING WITH ALGINATE:
-
If using alginate, then a latex bald cap can be used however if using silicone to life cast, then a cap plastic bald cap must be used - this is because latex inhibits the cure of silicone.
-
Brush aquacolour along the hairline of the model on the bald cap, this will transfer onto the fibreglass and will show the hairline which is otherwise hard to see.
-
Depending on what point you want your cast to come down to, stick a bin bag to your model using medical tape. This will protect their clothes and give you a point to work to.
-
Use Nivea to protect the eyebrows, eyelashes and any other facial hair. This is better than Vaseline as it is less greasy and moisturises the skin.
-
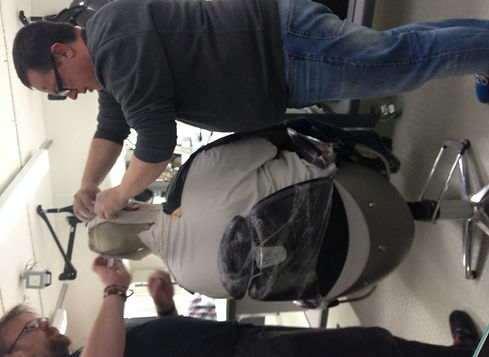
Plaster bandage is first applied to the the back, outlining the second half of the life cast. This goes behind the ear. Plaster bandage should be folded, with the folded edge running along the middle section. This will create a strong edge. This edge should be as neat as possible.
-
The back section is built up with plaster bandage. There are also boned sections which add support - it is important that these bones are symmetrical to avoid warpage.
-
Nivea is then applied to the bald cap.
-
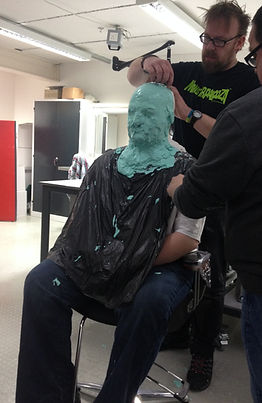
The front half of the headcast is then started, with alginate placed on the top of the head first and then worked downwards.
-
The alginate is then worked over and into the ear although it is not pushed inside the ear - instead it is allowed to flow into ear.
-
Alginate is worked over the rest of the face, with focus on the corner of the eyes to ensure that there are no air bubbles as this is often a problem area.
-
The alginate is then neatened so that it is flush to the folded edge of the plaster back.





-
Plaster bandage is then layered over the alginate
-
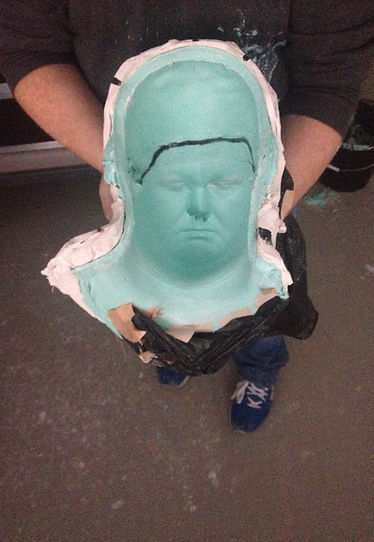
Marker is used to create markings to show how the plaster lines up
-
The final step is to finish the nose, which is done with the front part once it is off the face - the face is pushed into a lump of alginate which ............
HEADCASTING ACTOR
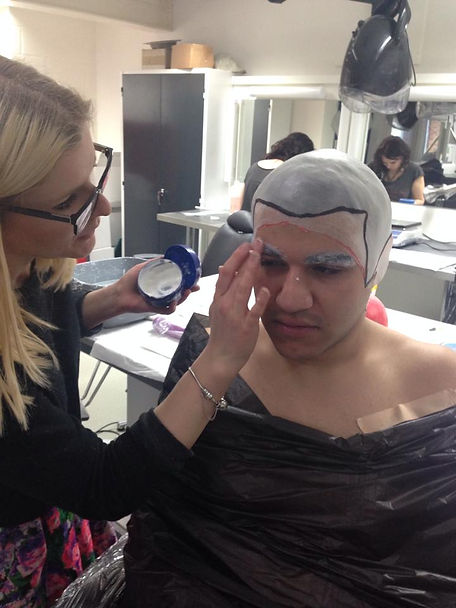
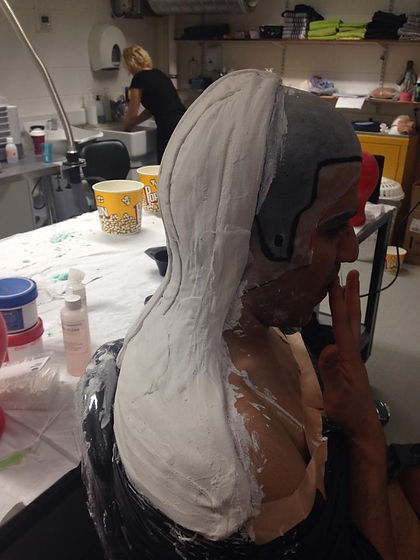

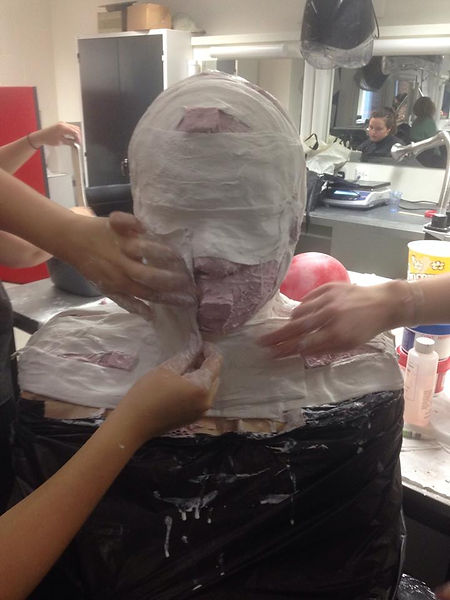
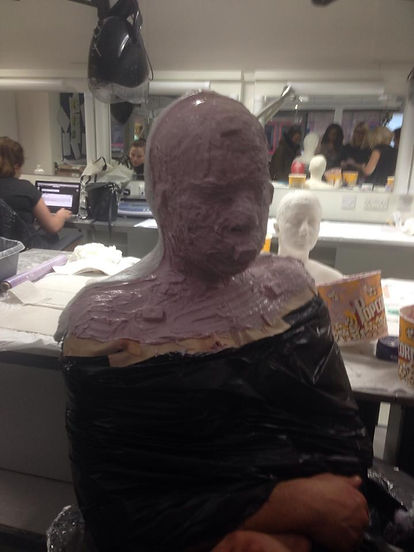
As I was using silicone for my face cast, I made a cap plastic bald cap. I did not know the size of my actors head when creating the bald cap and therefore had to guess. I made it too big which caused problems later in the fiberglassing process, I also made the cap too thick - I made the bald cap 6 layers thick as i was worried it would rip - I then struggled to blend the bald cap into the skin.
I also trimmed the bald cap before putting it on the head, whereas I should have trimmed the bald cap once it was on the head as I had accidentally trimmed it too much.
I then made some silicone keys using an icecube tray - something I had seen in my research previously. These keys keep the silicone in the correct place.
I decided that I would use modrock on the back rather than silicone all over
This was a decison which I later regretted, as using a modrock back meant that my life cast mould could only be used once, whereas if I had used silicone all over, I would have been able to create several fibreglass cores.
( I will explain this further in the process)
I I tried my best to keep a neat folded edge and to keep my modroc neat in general. I used the boned modrock to give structure, as we were shown in the demonstration.
I used a thin layer of silicone for the first layer (200g of silicone) to ensure that I captured all the detail of the face. I then used a thicker second layer. I preferred using silicone over alginate as I could take my time with the application, whereas I often find myself panicing and rushing when using alginate (I need more practice with lifecasting with alginate).
Another positive to using silicone was that the thin detail layer allows you to ensure there are no air bubbles - something I have struggled with when working with alginate.
I then placed the keys in several places on the silicone such as the on the collar bones, on the sides of the head, over the mouth and on the forehead. In hindsight I should have made more keys - this is something I will do in future.
We then plaster bandaged over the silicone, getting a close as possible to the edges of the keys - but keeping them out of the bandage. It was also important to get the bandage as close to the edge of the back bandage.
My model kept moving his arms and body which made it difficult as the bandage on his back kept pulling away from his body. This caused a gap which would then need to be fixed later in the process.

We then made our markings on both parts of the plaster to show us exactly how they fit back together.
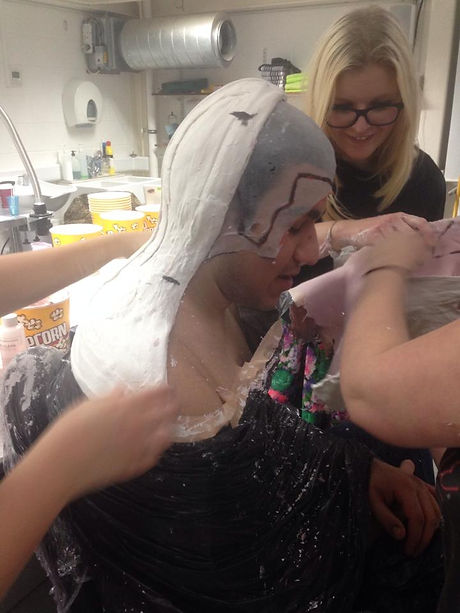

I was happy with the general outcome of the cast - ther were no airbubbles however as the bald cap was a little big, I could see from the cast that it had folded which I would need to sand out when I fiberglass it.
The final step was to finish the nose by mixing up a little extra silicone and wiping it around the nostril area, I then added some plaster bandage over the nostrils.
Overall I preferred using silicone to alginate for the casting process however I understand that alginate is a much more cost effective method and I should practice with it to become more confidence when using it.
RESEARCH
uses spatula's rather than hands because hands will inhibit the silicone a little.
Works front to back with plaster bandage - cutting edge
Puts a piece over the nose - logic is that the nose is the most delicate part of a lifecast - this one will be the most set up and on for awhile (does earlier on)
Bandage folded over 3 or 4 times
wet paper towels over cutting edge before starting back plaster
When cutting the silicone at the back, he zig zags, so that they will allign back together more easily rather than cutting a straight line

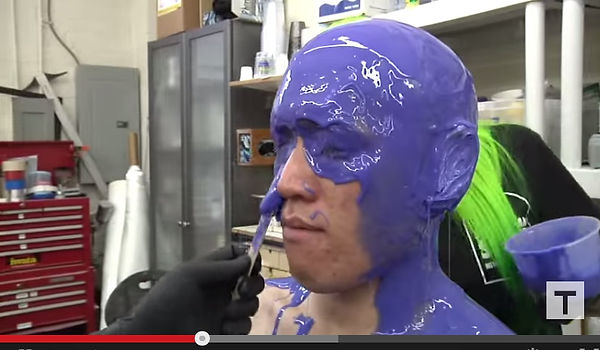

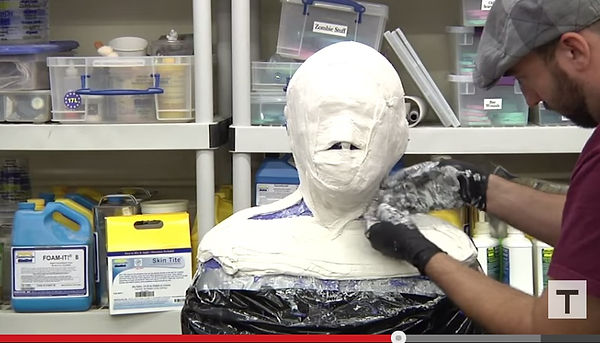


Frank uses life casting silicone and applies it to the ears first and his assistant starts applying to the lowest point of the cast.
He uses spatula's to apply the silicone as he says that using hands will cause the silicone to inhibit a little. He would use hands if using alginate. The spatula's seem to give a smoother surface and seem quite nice to work with. I might try using wooden spatula's next time that I do a silicone life cast.
He also wears gloves as it means that he can move from one process to the next, without trying to get his hands clean. I find trying to pick off the material from my hands does take time - perhaps gloves are something I should consider. NOT latex gloves - would inhibit silicone.
He works from the front forwards, creating a cutting edge using bandage which has been folded 3-4 times.
One of the first pieces of plaster bandage that Frank applies is a strip down the nose. This is because the nose is the most delicate area of a life cast and it is best to get it setting sooner than the rest of the plaster.
This looks really neat - I aim to be as neat as this for my next life cast.
He then applies wet paper towels to the cutting edge of the plaster, this prevents the back side of the plaster sticking to the front and locking it on the models face. an interesting way to do it - have not seen this before.
Registration points - ensures that the mould alligns
Frank asked his assistant to make the silicone on the center, back of head extra thick - you can see the thickness of this in the screenshot. This is to make it stronger when cutting - it is not thin and will not tear as easily.
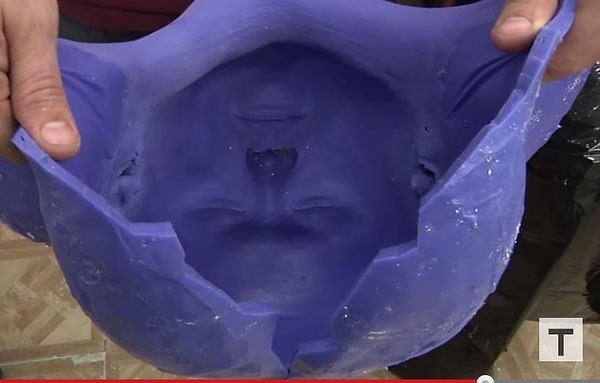
He cuts in a zig zag pattern, this will make it easier to re-allign together for pouring the plaster later on.
This shows the zig zag cutting pattern. Also shows how the cut is only to top of head ish.
A brilliant cast with no visible air bubbles.
This was a great insight into other techniques used to create a silicone head cast by someone in the industry.
Fig. 113.